Wednesday, December 31, 2014

Adding Strain Relief to Your Logitech UE900 Cables

I purchased a UE900 Vi cable for my Shure 215s awhile ago. I really like how light the cable is compared to the stock Shure cable. The UE cable also significantly cuts down on cable microphonics. The only thing the UE cable lacked was proper strain relief at the TRS plug.


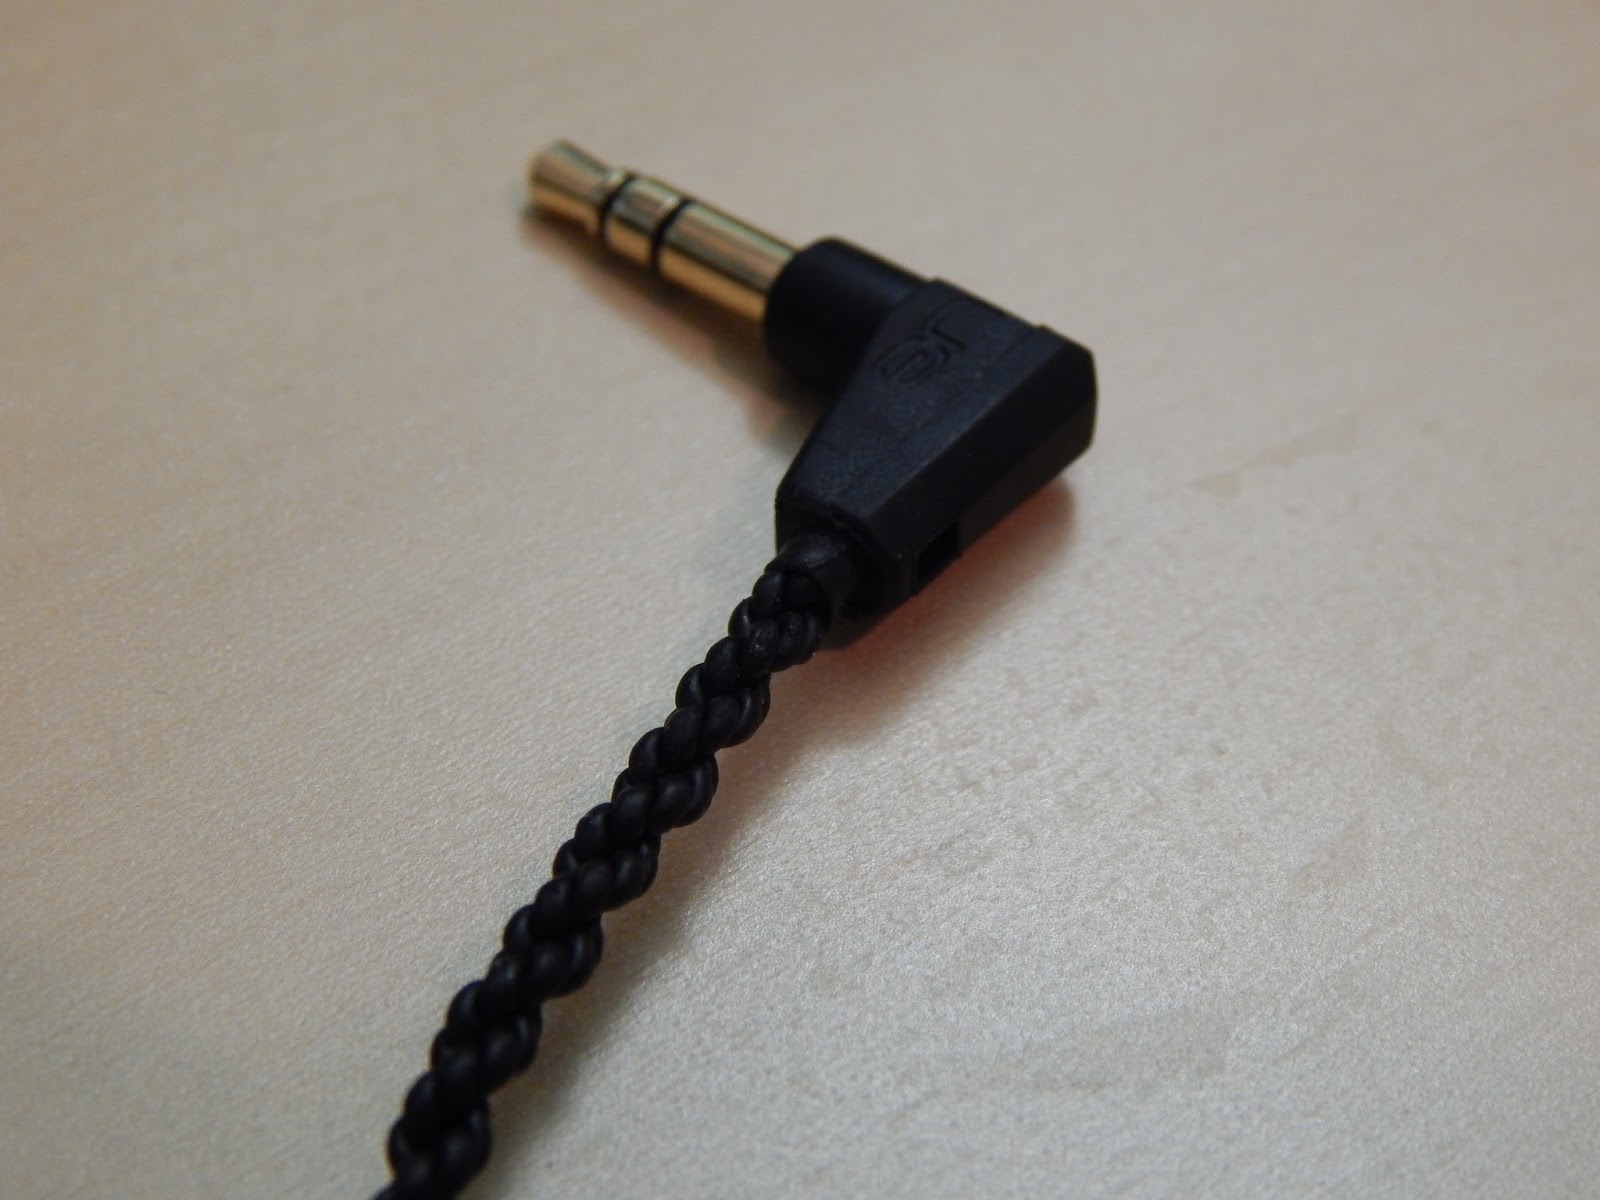
As you can see from the picture, the UE cable terminates into the TRS plug without proper strain relief. This design flaw allows the cable to bend sharply, especially when inside a pocket. This sharp bending will greatly reduce the lifespan of the cable. Fixing this design flaw is easy and works for any cable.

What you'll need:
  • spring
  • wire snips
  • shrink wrap
I pulled a spring out of a retractable ball point pen.


I then bent one end of the spring open so I could wrap it around the cable.


I made sure that the spring was wrapped around the plastic "collar" of the TRS plug.


I then snipped the excess spring from around the plug.


I threaded shrink wrap onto the cable starting from the top of the cable.


Placed the shrink wrap onto the TRS plug making sure there the spring was still attached to the collar of the the plug.


I applied heat to the shrink wrap and fixed a bit of the spring that was uneven at the top.


Now I don't have to worry about my cable being damaged when my player is sitting inside my pocket.

Sunday, December 28, 2014

Stop Xubuntu From Turning of Your Monitor Every 10 minutes

There is this nasty little bug in Xubuntu 14.04 and 14.10 that turns on a blank screensaver every ten minutes regardless of your power or light locker settings.

You can check your xset settings to see if your system is suffering from the same problem.

In a terminal type:

xset -q
Keyboard Control:
  auto repeat:  on    key click percent:  0    LED mask:  00000002
  XKB indicators:
    00: Caps Lock:   off    01: Num Lock:    on     02: Scroll Lock: off
    03: Compose:     off    04: Kana:        off    05: Sleep:       off
    06: Suspend:     off    07: Mute:        off    08: Misc:        off
    09: Mail:        off    10: Charging:    off    11: Shift Lock:  off
    12: Group 2:     off    13: Mouse Keys:  off
  auto repeat delay:  500    repeat rate:  20
  auto repeating keys:  00ffffffdffffbbf
                        fadfffefffedffff
                        9fffffffffffffff
                        fff7ffffffffffff
  bell percent:  50    bell pitch:  400    bell duration:  100
Pointer Control:
  acceleration:  13/10    threshold:  4
Screen Saver:
  prefer blanking:  yes    allow exposures:  yes
  timeout:  600    cycle:  600
Colors:
  default colormap:  0x20    BlackPixel:  0x0    WhitePixel:  0xffffff
Font Path:
  /usr/share/fonts/X11/misc,/usr/share/fonts/X11/Type1,built-ins
DPMS (Energy Star):
  Standby: 0    Suspend: 0    Off: 3600
  DPMS is Disabled
xset has been forcing a blank screensaver to activate every 600 secs (10 minutes).

Fixing it requires a simple terminal command:
xset s off

Install and Customize notify-osd in Xubuntu

I love Ubuntu's notification system, it manages to be both functional and beautiful, but it lacks customization options.

The following guide will show you how to install a custom version of Ubuntu's notify-osd that will allow you full control of the color, text, opacity, behavior and location of your notifications.

You first need to install two PPAs. leolik's PPA contains a customizable notify-osd package. amandeepgrewal's PPA includes notifyosdconfig, a gui interface that makes customizing notify-osd much easier.


To add leolik's PPA:
sudo add-apt-repository ppa:leolik/leolik

To add amandeepgrewal's PPA:
sudo add-apt-repository ppa:amandeepgrewal/notifyosdconfig

Install the necessary packages:
sudo apt-get update && sudo apt-get install notify-osd notifyosdconfig


For Xubuntu Users:

You can uninstall Xfcebuilt in notifaction system xfce4-notifyd:
sudo apt-get remove xfce4-notifyd


Or you can just set notify-osd as the default notification service. Sometimes after an Xubuntu update xfce-notifyd replaces notify-osd as your default notification service and you'll have to repeat this step.

Open a terminal:
gksu gedit /usr/share/dbus-1/services/org.xfce.xfce4-notifyd.Notifications.service

Replace:
Exec=/usr/lib/xfce4/notifyd/xfce4-notifyd

With:
Exec=/usr/lib/notify-osd/notify-osd

Save and exit.

You will have to reboot your computer for the changes to take effect.

Sources: 1 2 3

Sunday, December 21, 2014

Install Microsoft Fonts In Ubuntu

Install the Microsoft Core Fonts
sudo apt-get install msttcorefonts

Make a font directory
sudo mkdir /usr/share/fonts/Vista

Make a tempory storage directory
mkdir ~/Desktop/Vista

Download Microsoft Power Point Viewer 2007

Open the .exe file with Archive Manger

Double click ppviewer.cab file

Select each .TTF (TrueType font) file by single clicking it while holding down CTRL. Then select Extract. Save these fonts in the Desktop folder you created.

Move the extracted Microsoft fonts to your system font folder
sudo mv ~/Desktop/Vista /usr/share/fonts/Vista

Update your font cache
sudo fc-cache -fv

Your Windows fonts are ready to be used by any program or user on your system, you can delete the temporary Desktop folder.

Installing a TTF Font

Step 1: Prepare your files
Uncompress your fonts (right click>Extract Here). 


Step 2: Now make a directory for your custom ttf fonts
in a terminal type:
sudo mkdir /usr/share/fonts/truetype/custom


Step 3: Put the ttf font into the folder your created
In a terminal type:
gksu nautilus (for ubuntu)
gksu thunar (for xubuntu)

This will bring up a nautilus/thunar window, navigate to /usr/share/fonts/truetype/custom and copy/paste your fonts into this folder.


Step 4: Rebuild your font cache
In a terminal type:
sudo fc-cache -f -v

Wednesday, December 17, 2014

Fixing the ttf-mscorefonts-installer error in Ubuntu 14.10

When using the ubuntu-restricted-extras or xubuntu-restricted-extras meta package to install mscorefonts in Ubuntu 14.10 the package fails to install correctly. This bug has been around since the alpha builds. Installing the package separately fixes the errors with downloading the extra data files.


To fix it, in a terminal enter: 
sudo dpkg -P ttf-mscorefonts-installer
sudo apt-get install ttf-mscorefonts-installer

Monday, December 15, 2014

How To Make A Mr Speakers Mad Dog Pro Cable

I love my Mr Speakers Mad Dog Pro headphones but the included 6ft cable is too short. Below are my notes on making a longer or shorter unbalanced stereo Mad Dog Pro audio cable.

What you need
You can use a 1/4 or 1/8th TRS adapter depending you your needs. I used a Rean Neutrik NYS228G 1/4th connector.


The pin layout:


1 = L+
2 = L-
3 = R+
4 = R-


There is a notch at the top of the SN-8-4(P) connector that you can use as a reference. Each pin is numbered but it is incredibly difficult to see the number when soldering.

1 = L+ used for left audio channel
3 = R+used for right audio channel

2 = L- ground
4 = R- ground


You should strip the Canare cable about 3/4th of an inch. Twist each strand tight, going with the natural bias of the wire, and then tin each strand. Measure each strand against the e-valucon plug and trim the strands down appropriately before soldering. It doesn't take alot of solder to make a solid connection to the e-valucon SN-8-4 plug. Patience and a steady hand is key.


Soldering the TRS adapter is much easier. Twist the L- & R- cable together and tin them with solder to form a common ground. Then solder the common ground, left and right audio channels to the appropriate connections.